Best Studio Lighting Kits for Home Photography 2026
The gap between “professional studio” and “second bedroom” has never been thinner. In 2026, you can build a home studio that rivals commercial setups for less than the cost of a single lens — if you know which lights actually deserve your money and which ones are just expensive paperweights with a brand name slapped on.
We spent weeks testing studio lighting kits in real home environments: a converted garage, a 10×12 spare room, and a corner of a studio apartment. Not in some pristine 2,000-square-foot commercial space. Real rooms. Real walls. Real constraints.
This guide covers strobes, continuous LEDs, softbox kits, and hybrid setups — all tested for the realities of home photography. No fluff. No affiliate padding. Just honest assessments of what works when you’re shooting in a room where the ceiling is eight feet and the neighbors can hear your modeling lamp clicking on at midnight.
Quick take: If you just want the answer — the Buy on Amazon →
Here’s the thing about continuous LED lighting: you see exactly what you’re going to get before you press the shutter. For photographers who came up on strobes, that sounds trivial. For everyone else — video shooters, content creators, people learning lighting for the first time — it’s the difference between guessing and knowing.
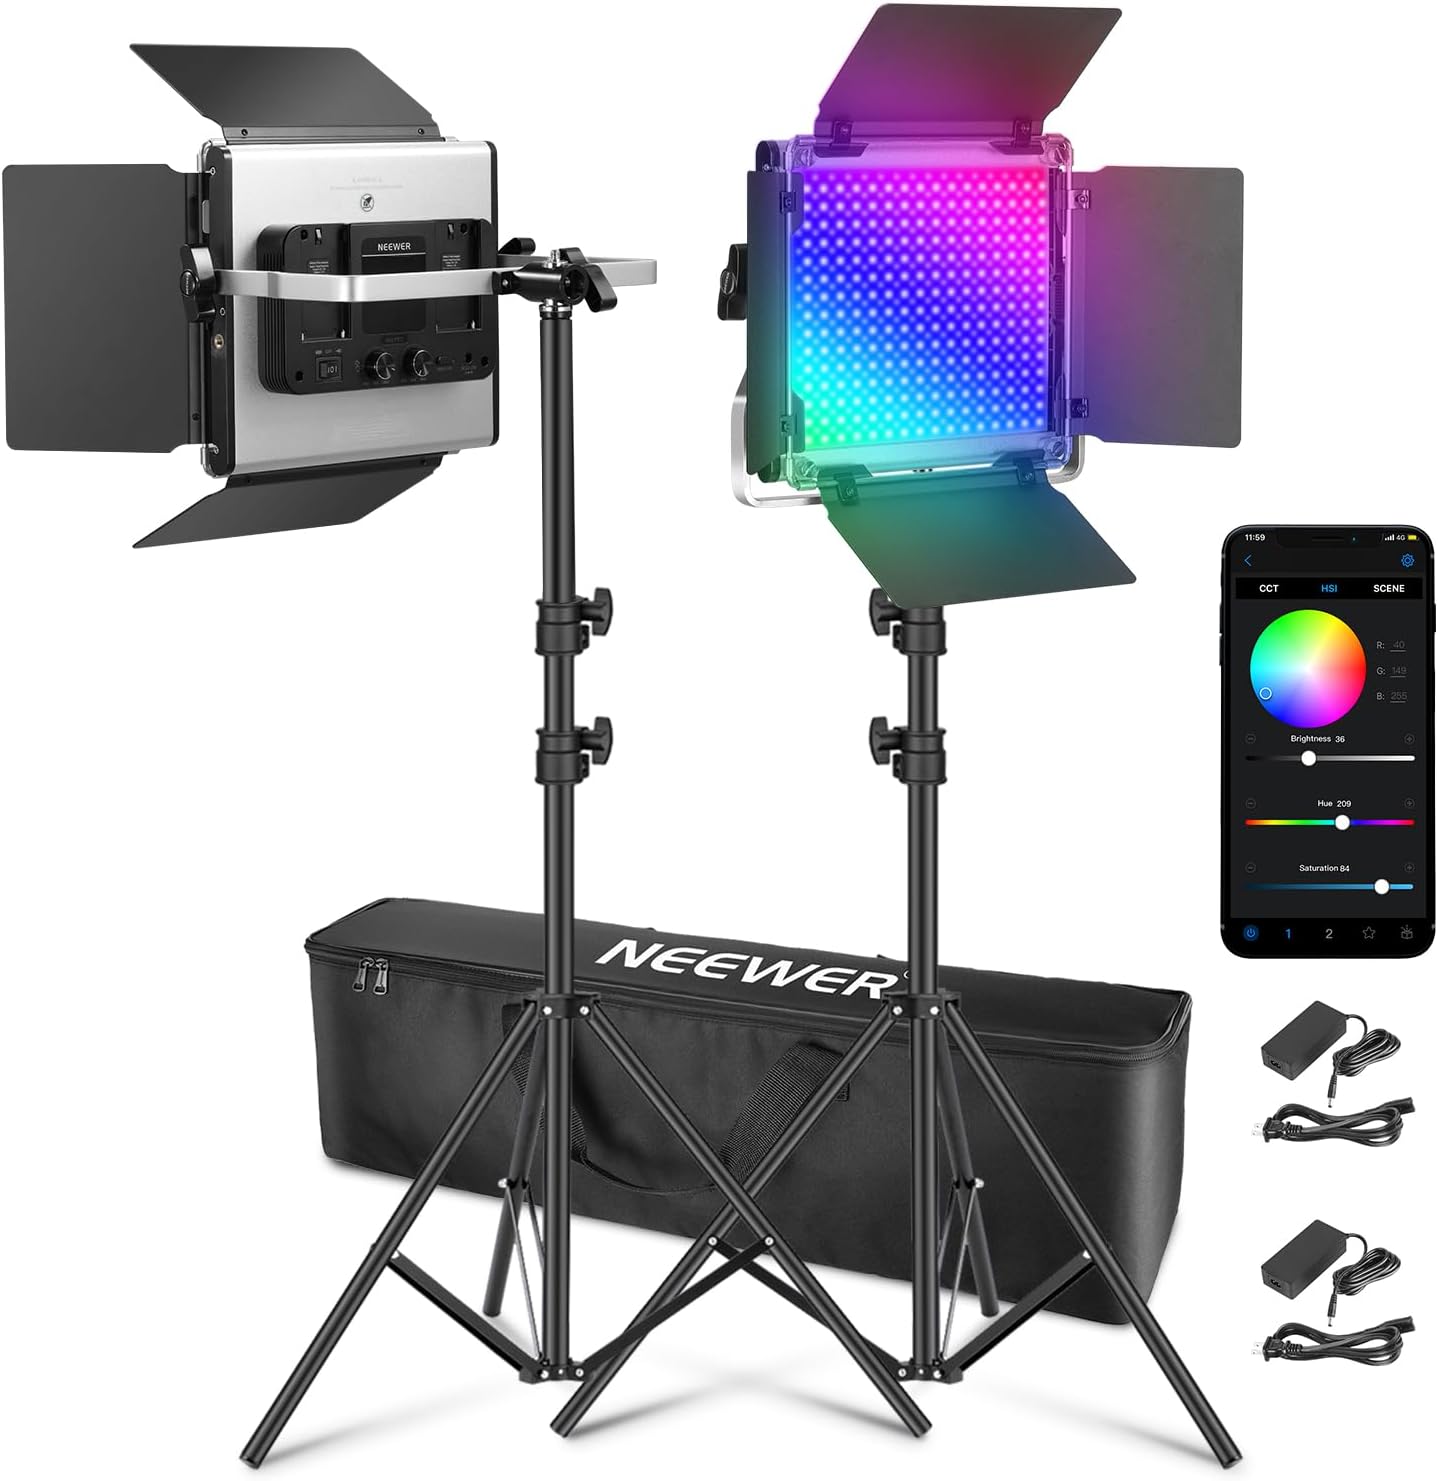
The Neewer 660 PRO II RGB kit gives you two 50W LED panels, two stands, and an app for remote control, all for a price that would barely cover a single mid-range strobe. The RGB designation means full 360° color output — not just bi-color warm-to-cool, but actual creative color. Want to paint your background in deep teal while keeping your key light neutral? Done. Need a subtle magenta rim for editorial edge? Two taps in the app.
In a home studio context
50W per panel won’t compete with a 300Ws strobe for raw output. At ISO 200 through a softbox, you’ll be shooting around f/2.8–f/4. That’s fine for portraits with shallow depth of field. It’s a problem if you need f/8 for product photography.
But here’s where the 660 PRO II kit shines: it’s always ready. No recycling, no flash, no pop. Turn it on, position it, shoot. For someone working in a home studio that doubles as a living room, that immediacy is worth more than an extra two stops of power you’ll rarely use.
The included stands are lightweight aluminum — fine for these panels, which aren’t heavy. The U-bracket mounting gives you 180° of tilt. The barn doors (included) shape the light with surprising precision for the price point.
What you’re giving up
CRI 97+ is excellent for the price, but it’s not CRI 98+. You’ll see marginal color shifts in extreme situations — deep reds and blues on fabric can render slightly flat compared to premium panels. The app is functional but not elegant — expect some Bluetooth connection hiccups. And the panels get warm, not hot, but warm enough to notice in a small room over a long session.
Verdict: The best budget entry into continuous lighting. Period. Two panels, two stands, full RGB, app control — this kit removes every excuse for bad lighting in your home studio. If you shoot video at all, this is your starting point.
4. Neewer Softbox Lighting Kit — Soft Light, Hard to Beat
Not everyone needs RGB. Not everyone needs app control. Sometimes you just need two lights, two softboxes, and the ability to make people look good in a spare room without spending a week learning lighting theory.
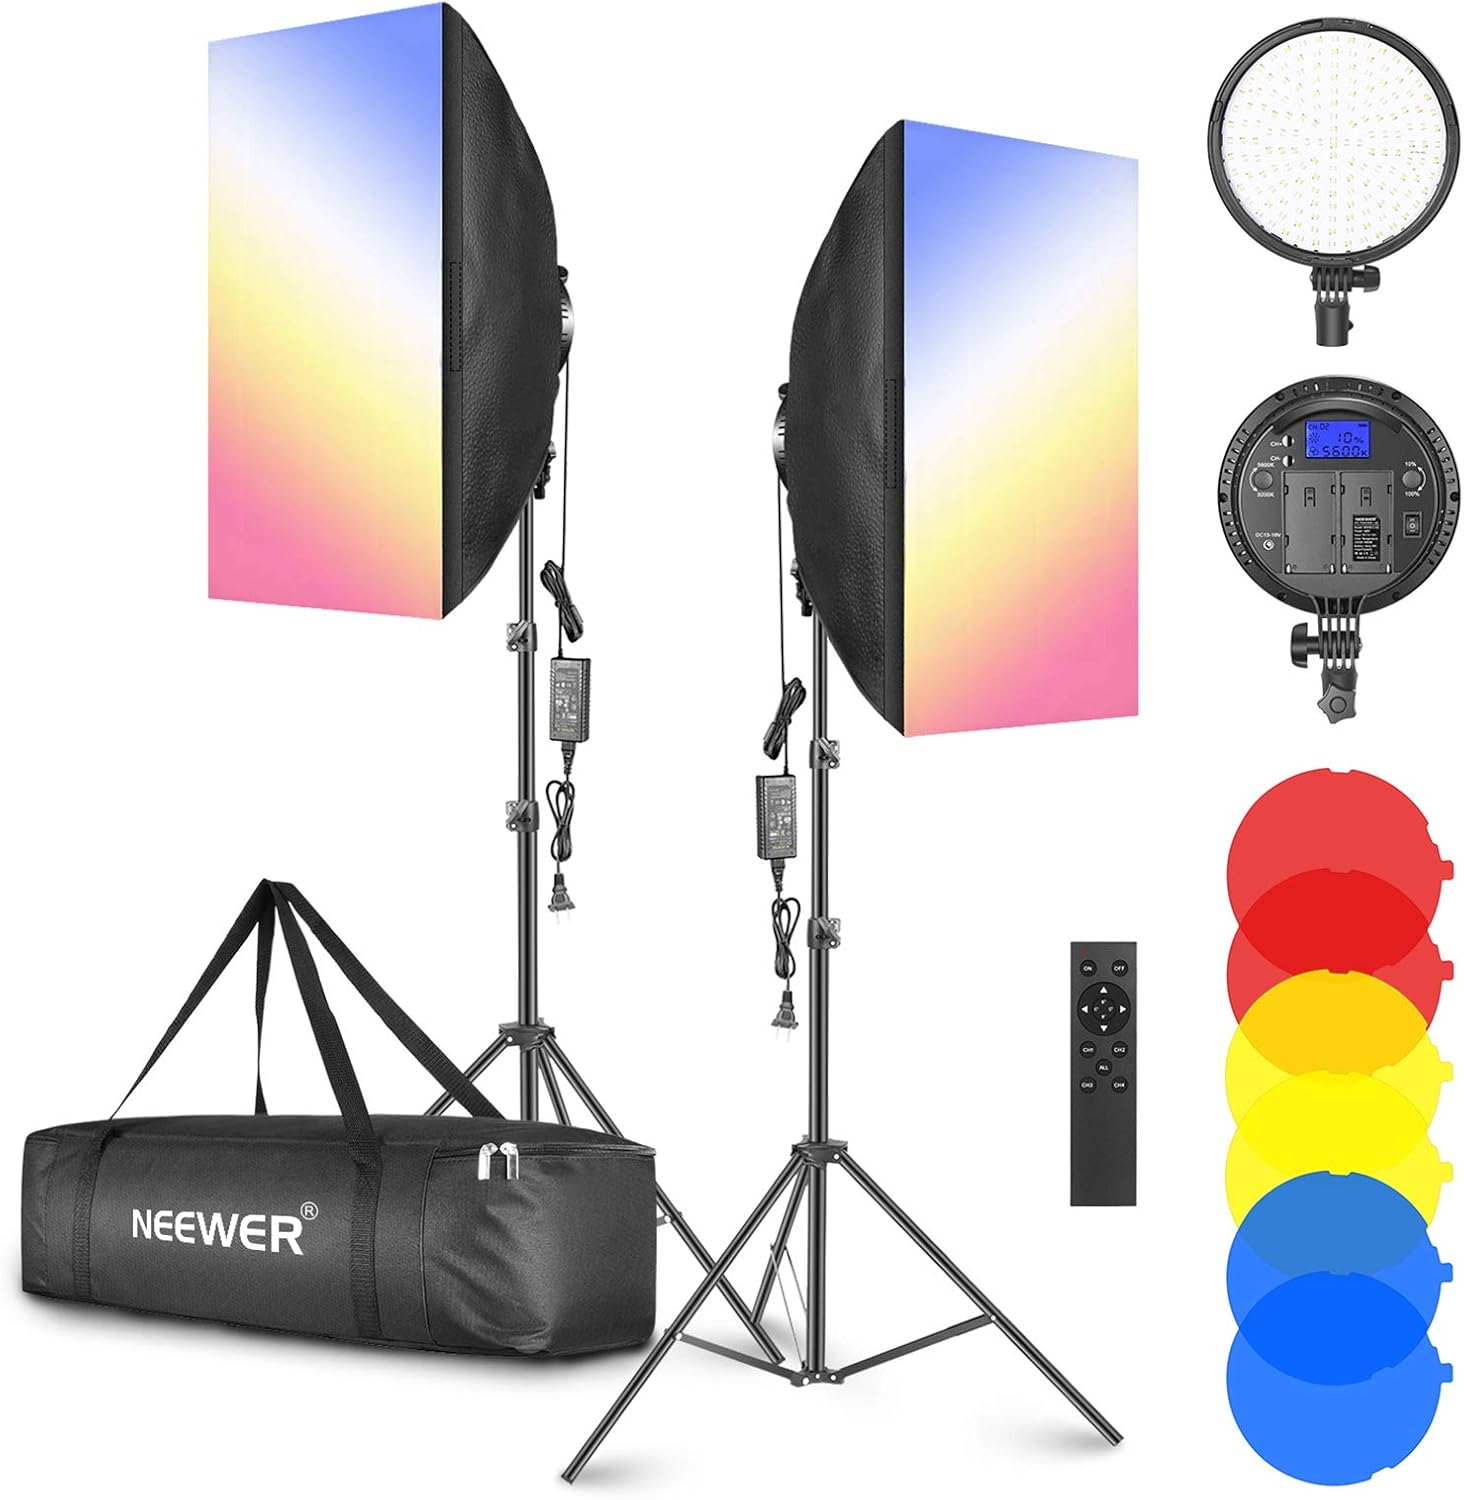
The Neewer softbox kit is exactly that: two 48W bi-color LED heads (3200–5600K), two 20″×28″ softboxes, two stands, and a 2.4GHz wireless remote. No app. No RGB. No decisions. Just soft, even, flattering light that makes everyone from your cousin to your client look like they stepped out of a magazine.
The case for simplicity
Softboxes are the most forgiving light modifier ever invented. They take whatever chaotic output your LED head produces and transform it into a wide, even, shadow-softening wash. The 20″×28″ rectangular shape creates a natural-looking key light that mimics window light — which, in a home studio, is exactly what your subjects are used to seeing on their faces.
The included color filters (red, yellow, blue) are a nice touch for creative effects, though most photographers will live in the 4300–5600K range. The 2.4GHz remote is simple but effective — on/off and dimming without touching the light. When your softbox is positioned above your subject at a 45° angle, that remote saves you from doing the awkward arm stretch every time you need to adjust.
The limitations
48W per head is modest output. Through the softbox, you’ll lose roughly a stop and a half of light, which means you’re working with the equivalent of ~24W of effective output. In practical terms: ISO 400–800 at f/2.8–f/4 in a moderately lit room. That’s portrait territory, not product or food photography where you need f/8+.
The stands are the same lightweight aluminum as the 660 PRO II kit — adequate but not confidence-inspiring with the softboxes attached, which catch air like sails if someone opens a door. Sandbags or weights are not optional. They’re mandatory.
Verdict: The most beginner-friendly kit on this list. If you’ve never owned studio lighting and just want to make your portraits look dramatically better tomorrow, this is it. The softboxes do the heavy lifting — the lights just need to turn on.
5. Aputure Amaran 200x S — The Cinematic Key Light
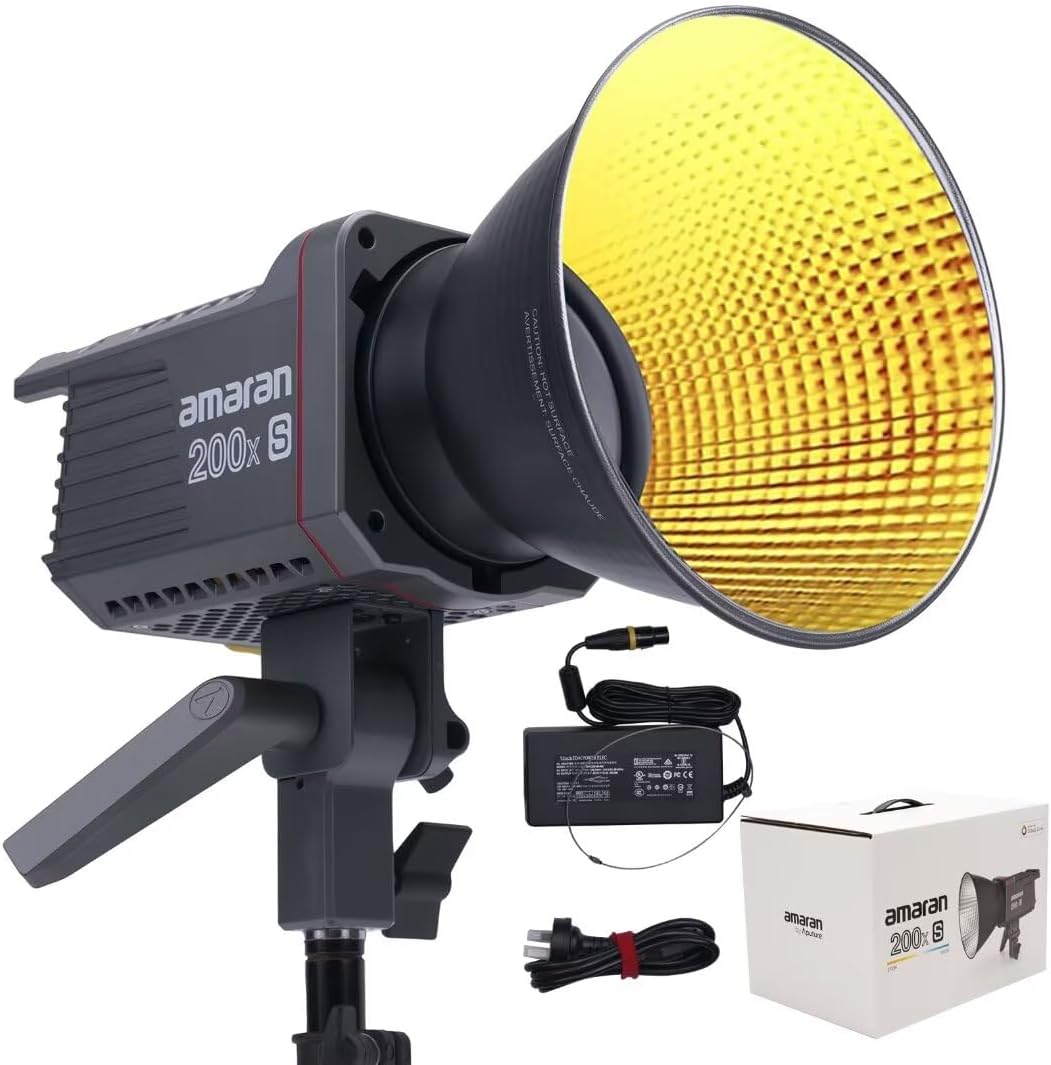
The Amaran line is Aputure’s way of saying “you don’t need to spend $2,000 on an LS 600x to get cinematic light.” The 200x S is a 200W bi-color COB LED (2700–6500K) with a Bowens mount, Sidus Link app control, and the kind of color accuracy (CRI 95+, TLCI 95+) that makes editors weep with relief.
This is a key light. Singular. One big, beautiful, punchy source that you shape with modifiers to create the light you want. It’s not a kit — you’ll need to add a stand, a softbox or lantern, and probably a V-mount battery if you want to go mobile. But as the foundation of a home cinema or editorial photography setup, it’s the real deal.
Why it costs what it costs
200W of output from a COB LED is no joke. This thing punches through large modifiers like they’re not there. Put it behind a 5-foot lantern and you still have f/4 at ISO 800 from eight feet. For video shooters who need consistent, flicker-free light across a scene — interviews, talking heads, product demos — this is the difference between “good enough” and “actually good.”
The 2700–6500K range covers every practical color temperature you’ll encounter. Matching warm practical lights at 3200K? Done. Mixing with daylight at 5600K? Done. The nine built-in lighting effects (lightning, fire, TV flicker, etc.) are genuinely useful for creative video work and not just gimmicks.
Sidus Link app control is where Aputure separates itself. The app works — reliably, consistently, without the Bluetooth handshake dance that plagues cheaper brands. Create scenes, save presets, group multiple lights. If you’re running a three-light Amaran setup, you control the whole rig from your phone in seconds.
The reality check
This is a single light. At its price point, you’re spending more than a complete Neewer kit costs for two panels and stands. The Bowens mount is great for modifier choice, but you’re buying those modifiers separately. A softbox, a stand, and the light itself will set you back $400+ before you’ve added a fill or a rim.
Also: 200W generates heat. The fan is quiet — Aputure’s thermal management is among the best — but it’s audible in a silent room. If you’re recording dialogue in a closet studio, you’ll hear it on the mic unless you’re running a shotgun or lavalier at distance.
Verdict: The Amaran 200x S is for people who’ve outgrown budget lighting and are ready to build a real system. Start here, add an Amaran 200d S for fill later, and you have a cinema-quality key/fill setup that scales with you.
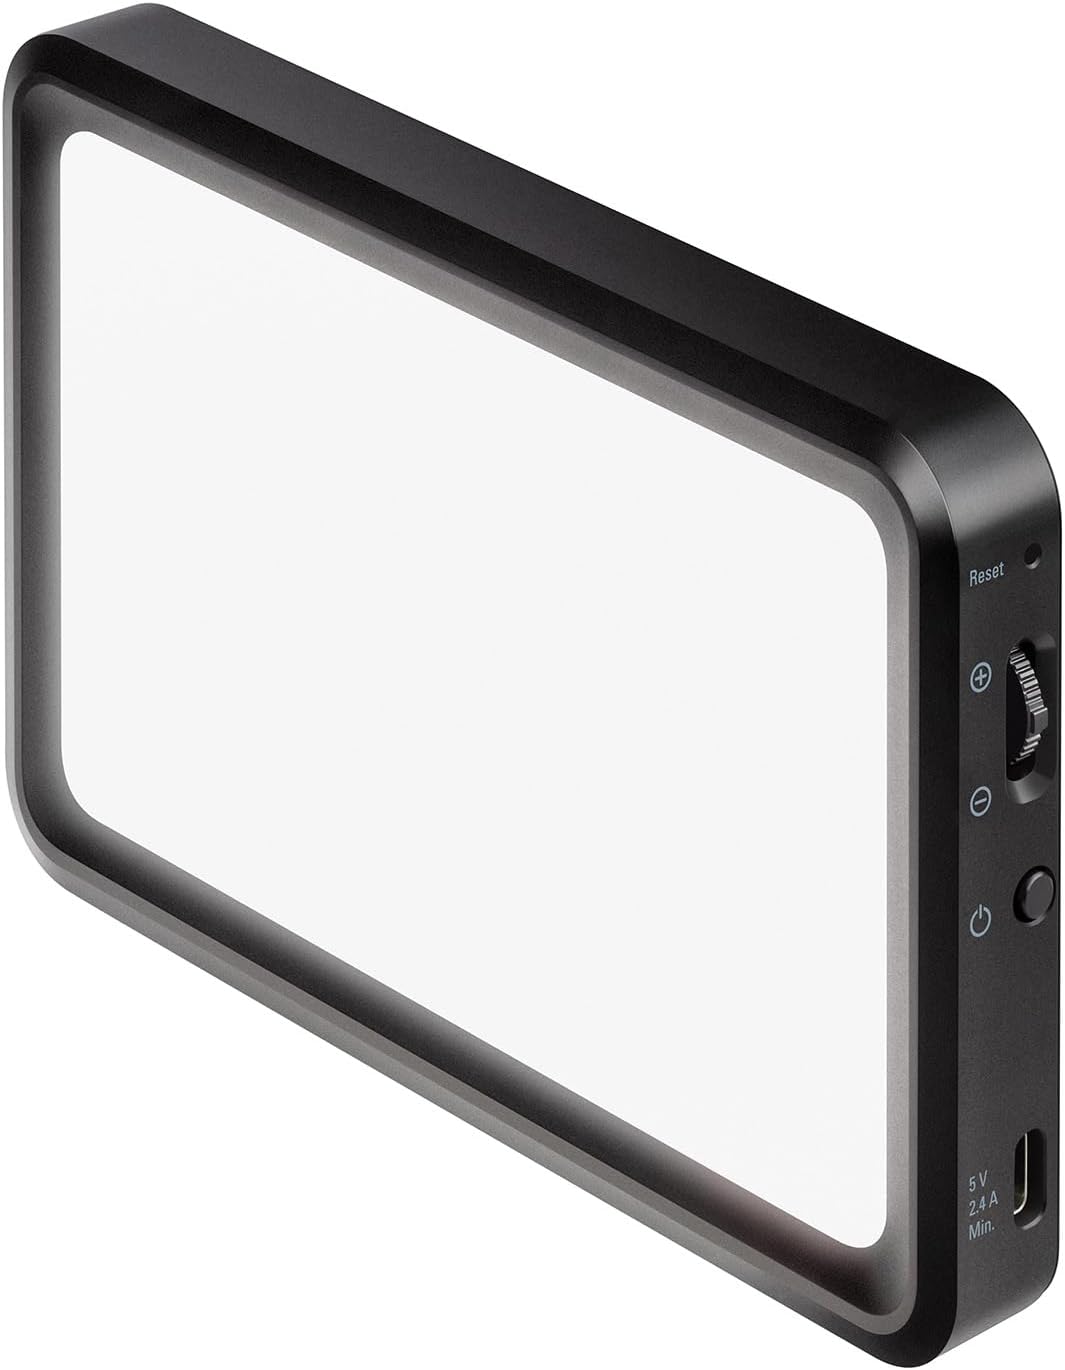
6. Elgato Key Light — The Desk Studio Essential
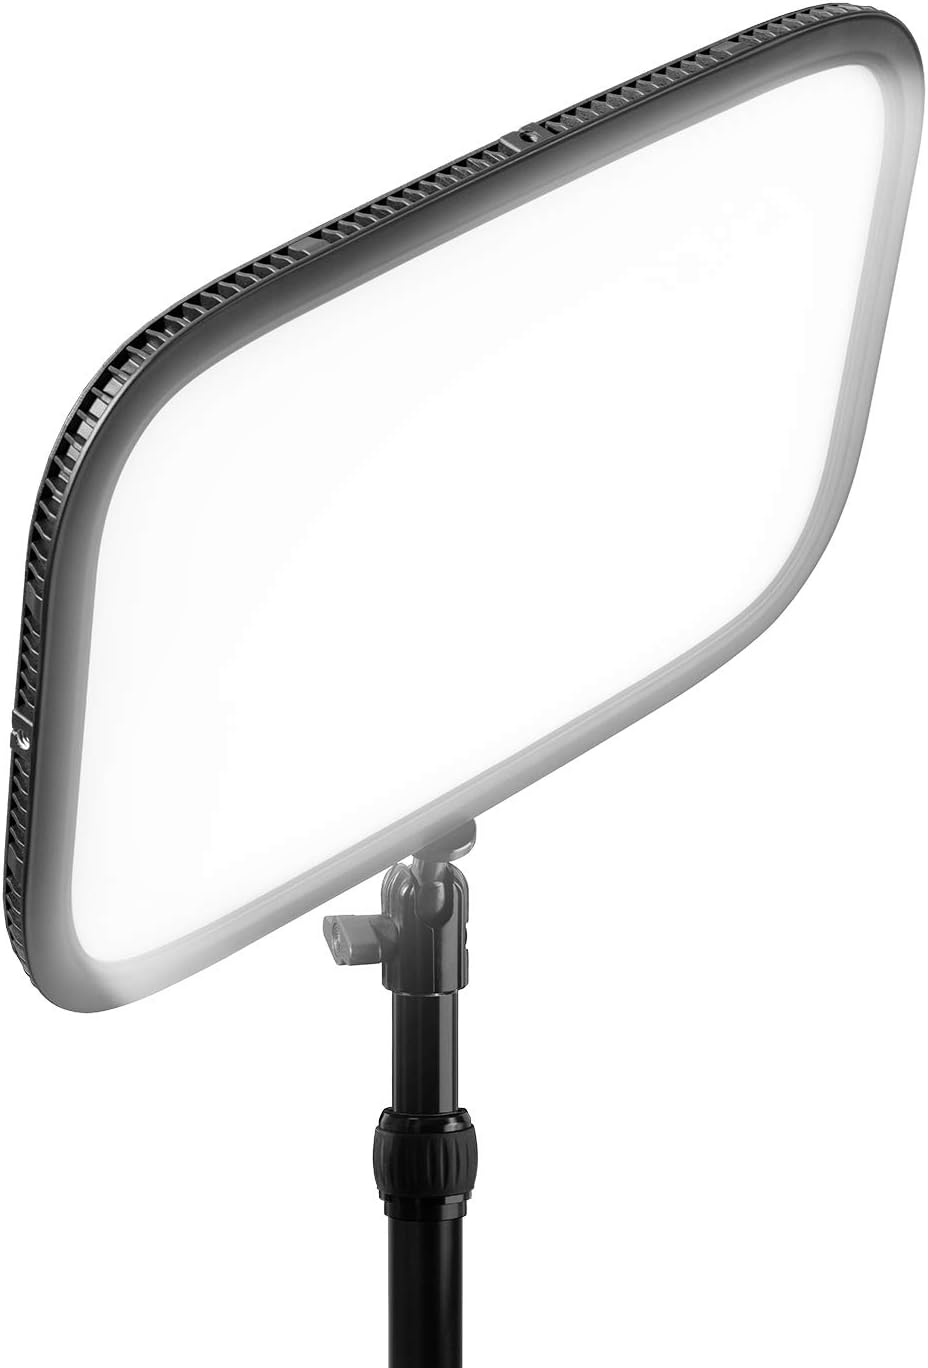
The Elgato Key Light wasn’t designed for photographers. It was designed for streamers. But here’s the thing that photographers keep rediscovering: a flat, edge-lit LED panel that mounts to your desk, is controlled entirely by app, and produces 2800 lumens of flicker-free, dimmable, color-temperature-adjustable light is exactly what you need for headshots, Zoom, product flat-lays, and anything that happens at a desk.
In a home studio, your desk is a studio. The Key Light treats that as a feature, not a bug. The desk clamp mount takes up zero floor space. The edge-lit design means no hot spots — the light is remarkably even across the entire panel. And the app control (Wi-Fi, not Bluetooth) is rock-solid. Turn it on, set your color temp, dial your brightness. Done.
Where it shines — and where it doesn’t
For seated work — headshots, streaming, video calls, flat-lay product photography — the Key Light is nearly perfect. The 2900–7000K range is wider than most panels, giving you incredible flexibility for matching ambient light or creating mood.
But 2800 lumens from a 17″×11″ panel is not studio strobe power. You’re not lighting a three-quarter-length portrait with this. You’re not overpowering a window. You’re not shooting at f/8. The Key Light is a precision tool for a specific kind of work, and it’s the best tool for that work.
The proprietary desk clamp is excellent if you have a desk with an accessible edge. It’s useless if you don’t. There’s no standard mounting option — no 1/4″-20, no light stand adapter. You’re committing to the desk-mount form factor.
Verdict: If your studio is your desk — for headshots, streaming, product flat-lays, or video calls — the Key Light is the most elegant solution available. It’s a one-trick pony, but that trick is genuinely useful and executed flawlessly.
7. Elgato Key Light Mini — Portable Power in Your Pocket
Everything the Key Light does, the Mini does smaller. 800 lumens instead of 2800. Rechargeable battery instead of wall-powered only. 8.6″×5.5″ instead of 17″×11″. And it fits in a jacket pocket.
This is the light you throw in your bag for location headshots. The one you clip to a shelf for an impromptu product shot. The one you hold in one hand while shooting with the other for an on-the-go interview. It’s not your primary studio light — it’s the one that saves the shot when everything else goes wrong.
The apartment photographer’s secret weapon
In a small apartment, the Key Light Mini is more useful than a full-size panel. It mounts anywhere — a shelf, a doorframe, a tripod with the cold shoe adapter. The internal battery means no power cord snaking across the floor (goodbye, trip hazard). The Wi-Fi app control is the same as the full-size Key Light. And the 2900–7000K range means you can match literally any ambient light condition.
800 lumens is enough for close-up work: headshots from three feet, product shots on a tabletop, rim lighting for a subject in a dark room. It’s not enough to be a key light for full-body work, but as a fill, rim, or accent light, it’s remarkably effective.
The built-in battery lasts about 60 minutes at full power and up to four hours at reduced brightness. For a two-hour headshot session, that’s plenty. For a full-day shoot, you’ll want the USB-C passthrough charging — plug it in and it runs indefinitely.
Verdict: The Key Light Mini is a “nice to have” that becomes a “can’t live without” the first time it saves your shoot. Small, smart, battery-powered — it’s the light you always have with you.
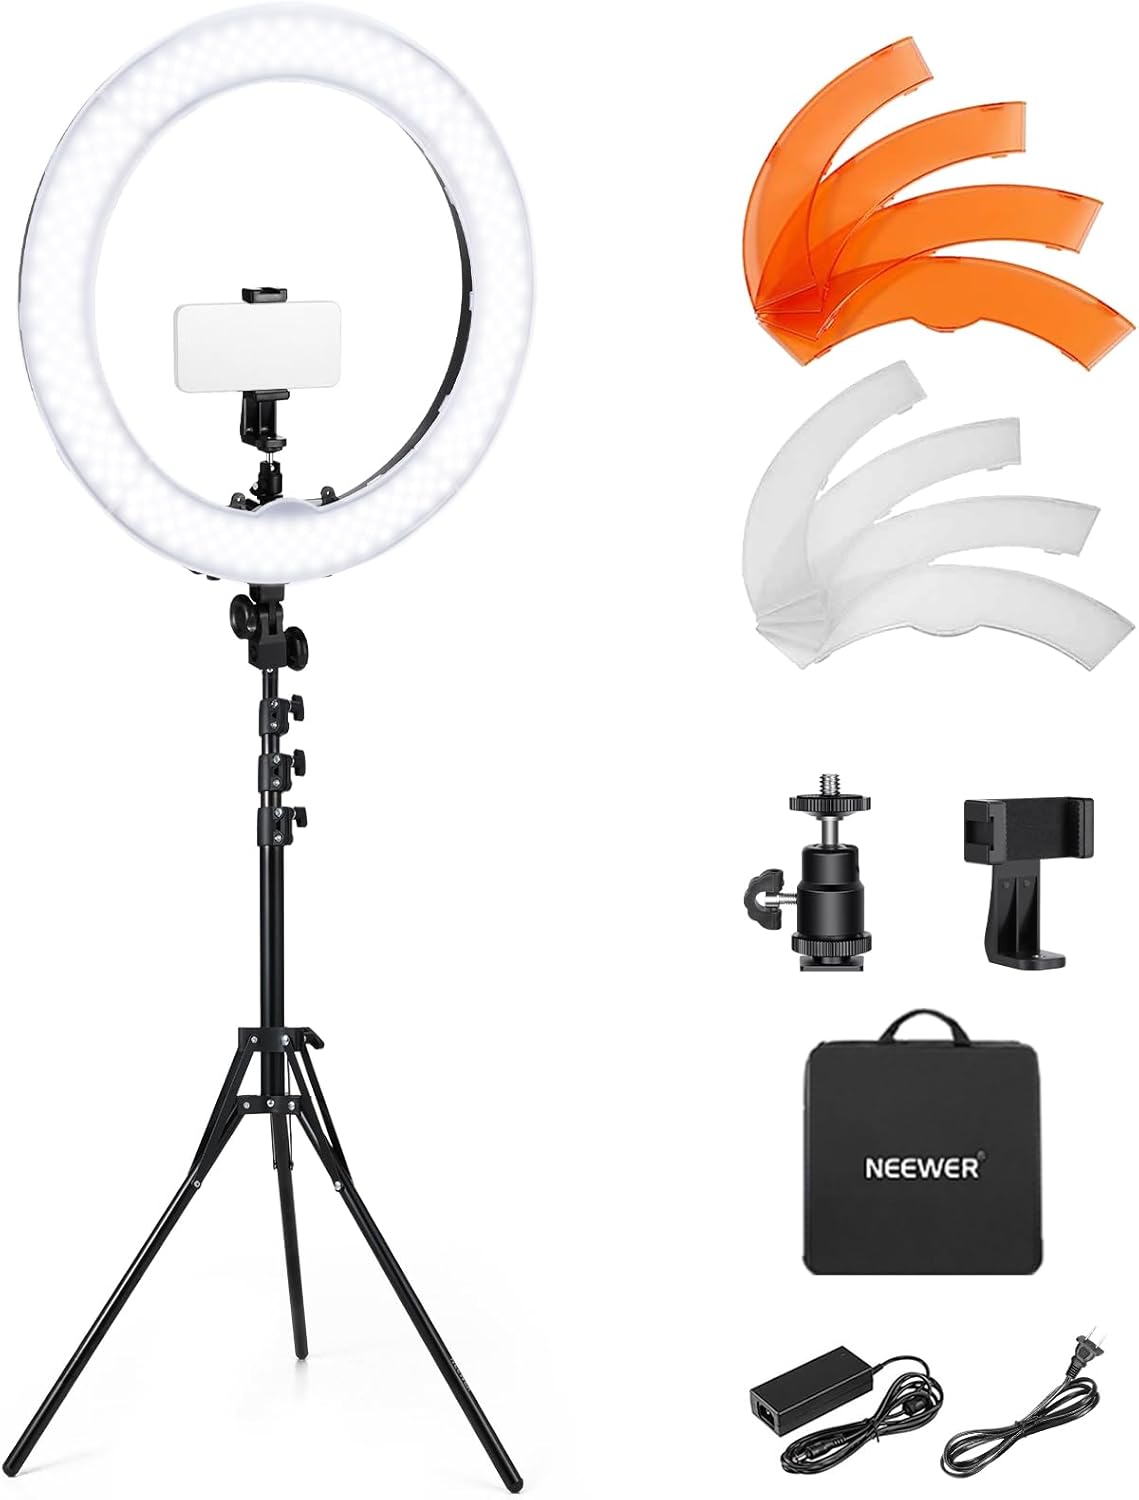
8. Neewer 18″ Ring Light Kit — The Beauty Shooter’s Best Friend
Say what you want about ring lights — and photography forums have said everything — but for beauty, makeup, skincare, and close-up portrait work, nothing produces that signature front-facing, shadow-softening, catch-light-circle look like a ring light. Nothing.
The Neewer 18″ ring light kit is the entry point that actually delivers. 58W of bi-color LED output (3200–5600K), a sturdy stand, a phone holder, and a cold shoe mount for a camera or external mic. The light tube is flexible, allowing angle adjustments that cheaper ring lights can’t manage. And the CRI of 95+ means skin tones render accurately — critical for beauty work where color shift is immediately visible.
Home studio advantages
Ring lights are inherently space-efficient. The subject stands inside the ring, so the light source wraps around them without needing the room width that a softbox + stand combination requires. In a 6-foot-wide home studio space, that’s not a small thing.
The 18″ diameter is the sweet spot for face-and-shoulders work. Smaller ring lights (10″, 12″) create harder light and smaller catchlights. Larger ones (20″+) are unwieldy in home spaces. The 18″ fills a face beautifully without dominating the room.
The included phone holder makes this kit instantly useful for content creators — TikTok, Instagram Reels, YouTube beauty tutorials. The cold shoe mount lets you shoot with a real camera through the center of the ring, which is how you get those iconic circular catchlights that define beauty photography.
The honest limitations
Ring lights produce flat, front-facing light. That’s their strength and their weakness. You can’t create dramatic side lighting, Rembrandt lighting, or split lighting with a ring light by itself. The look is specific — call it “beauty lighting” or “YouTube lighting” depending on your perspective.
The stand is the weak point. It works, but a heavy camera + lens combo on the center mount will challenge its stability. If you’re putting a DSLR through the ring, consider upgrading to a C-stand or at minimum adding a counterweight.
Verdict: For beauty, skincare, makeup, and social media content, the Neewer 18″ ring light kit is the best value in the category. It won’t replace a three-light strobe setup, but it was never trying to.
Buying Guide: How to Choose Your Home Studio Lighting
Choosing studio lighting is less about specs and more about how you work. The best light for you depends on what you shoot, where you shoot it, and how much fiddling you’re willing to tolerate. Here’s the honest breakdown.
Strobes vs. Continuous: The Fundamental Choice
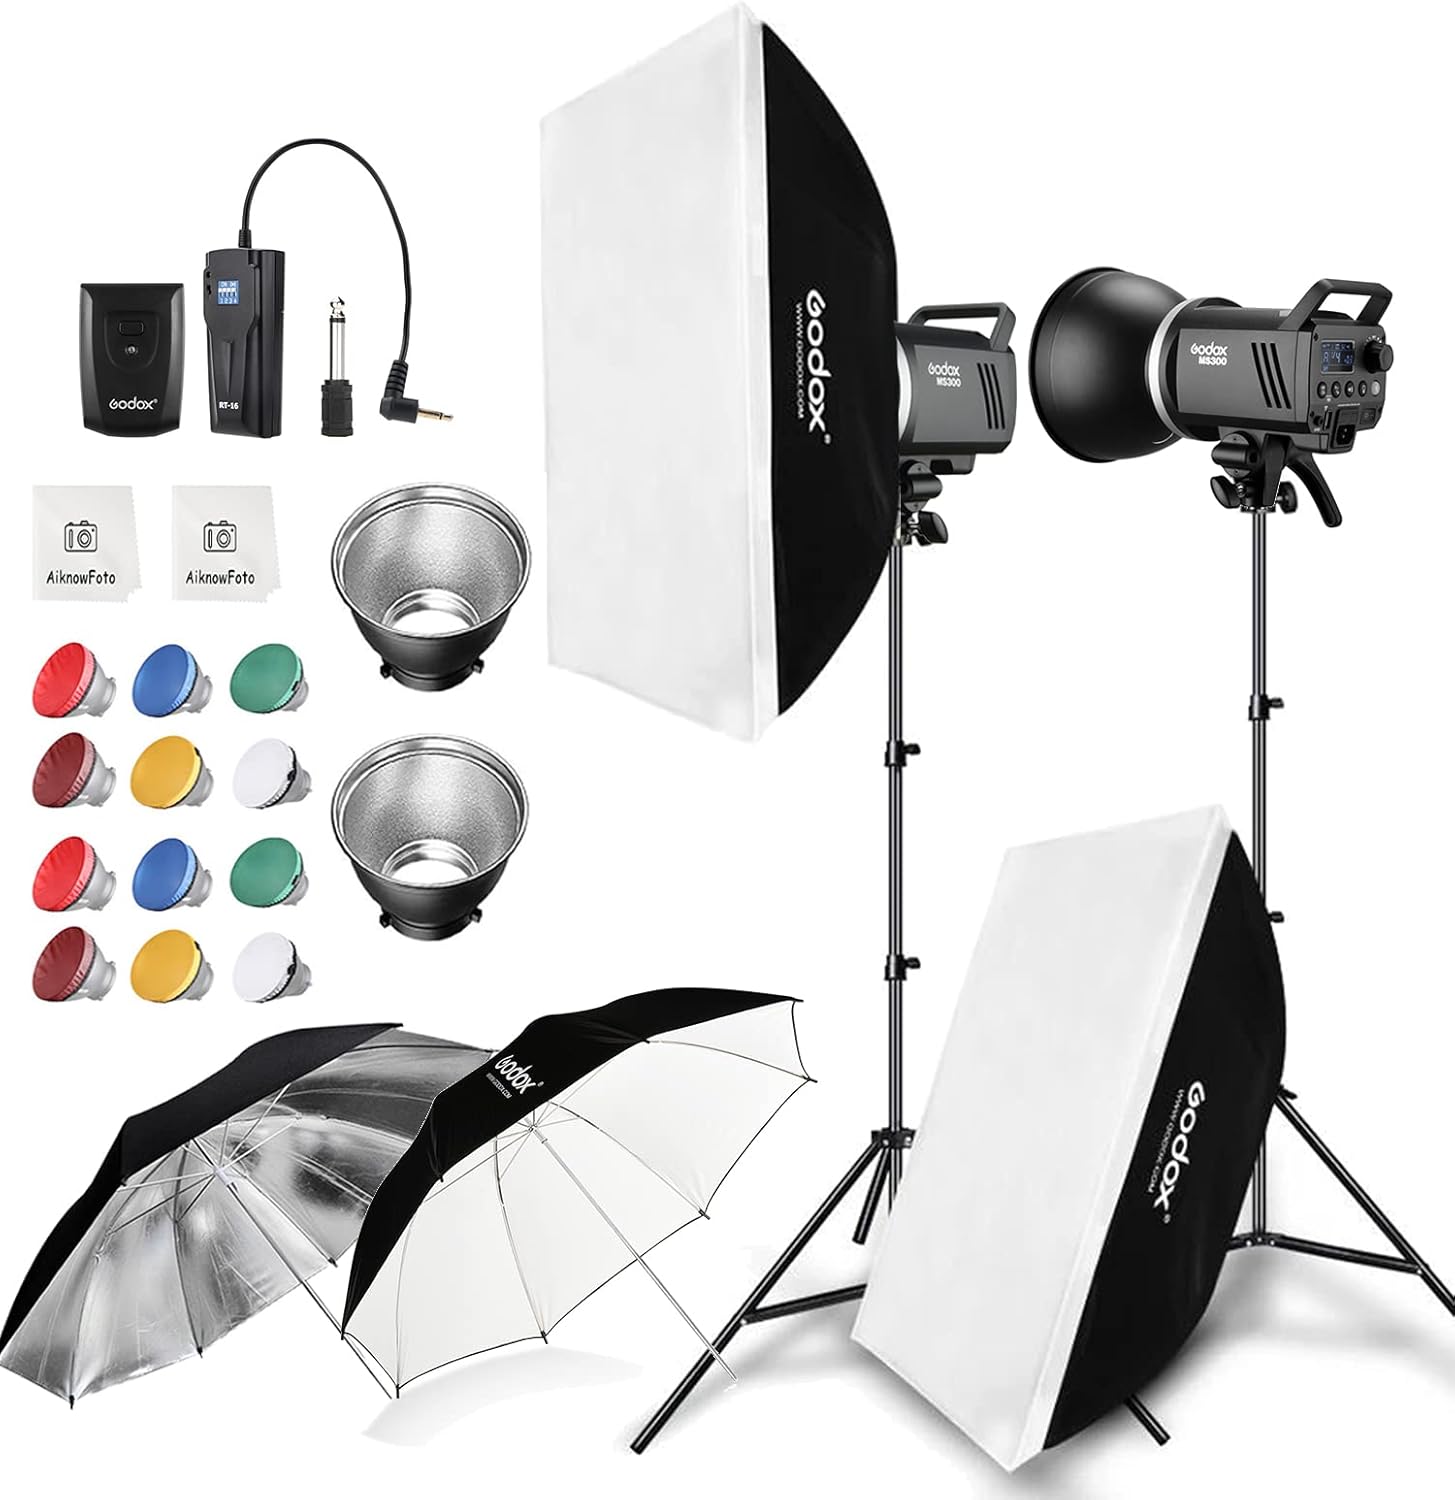
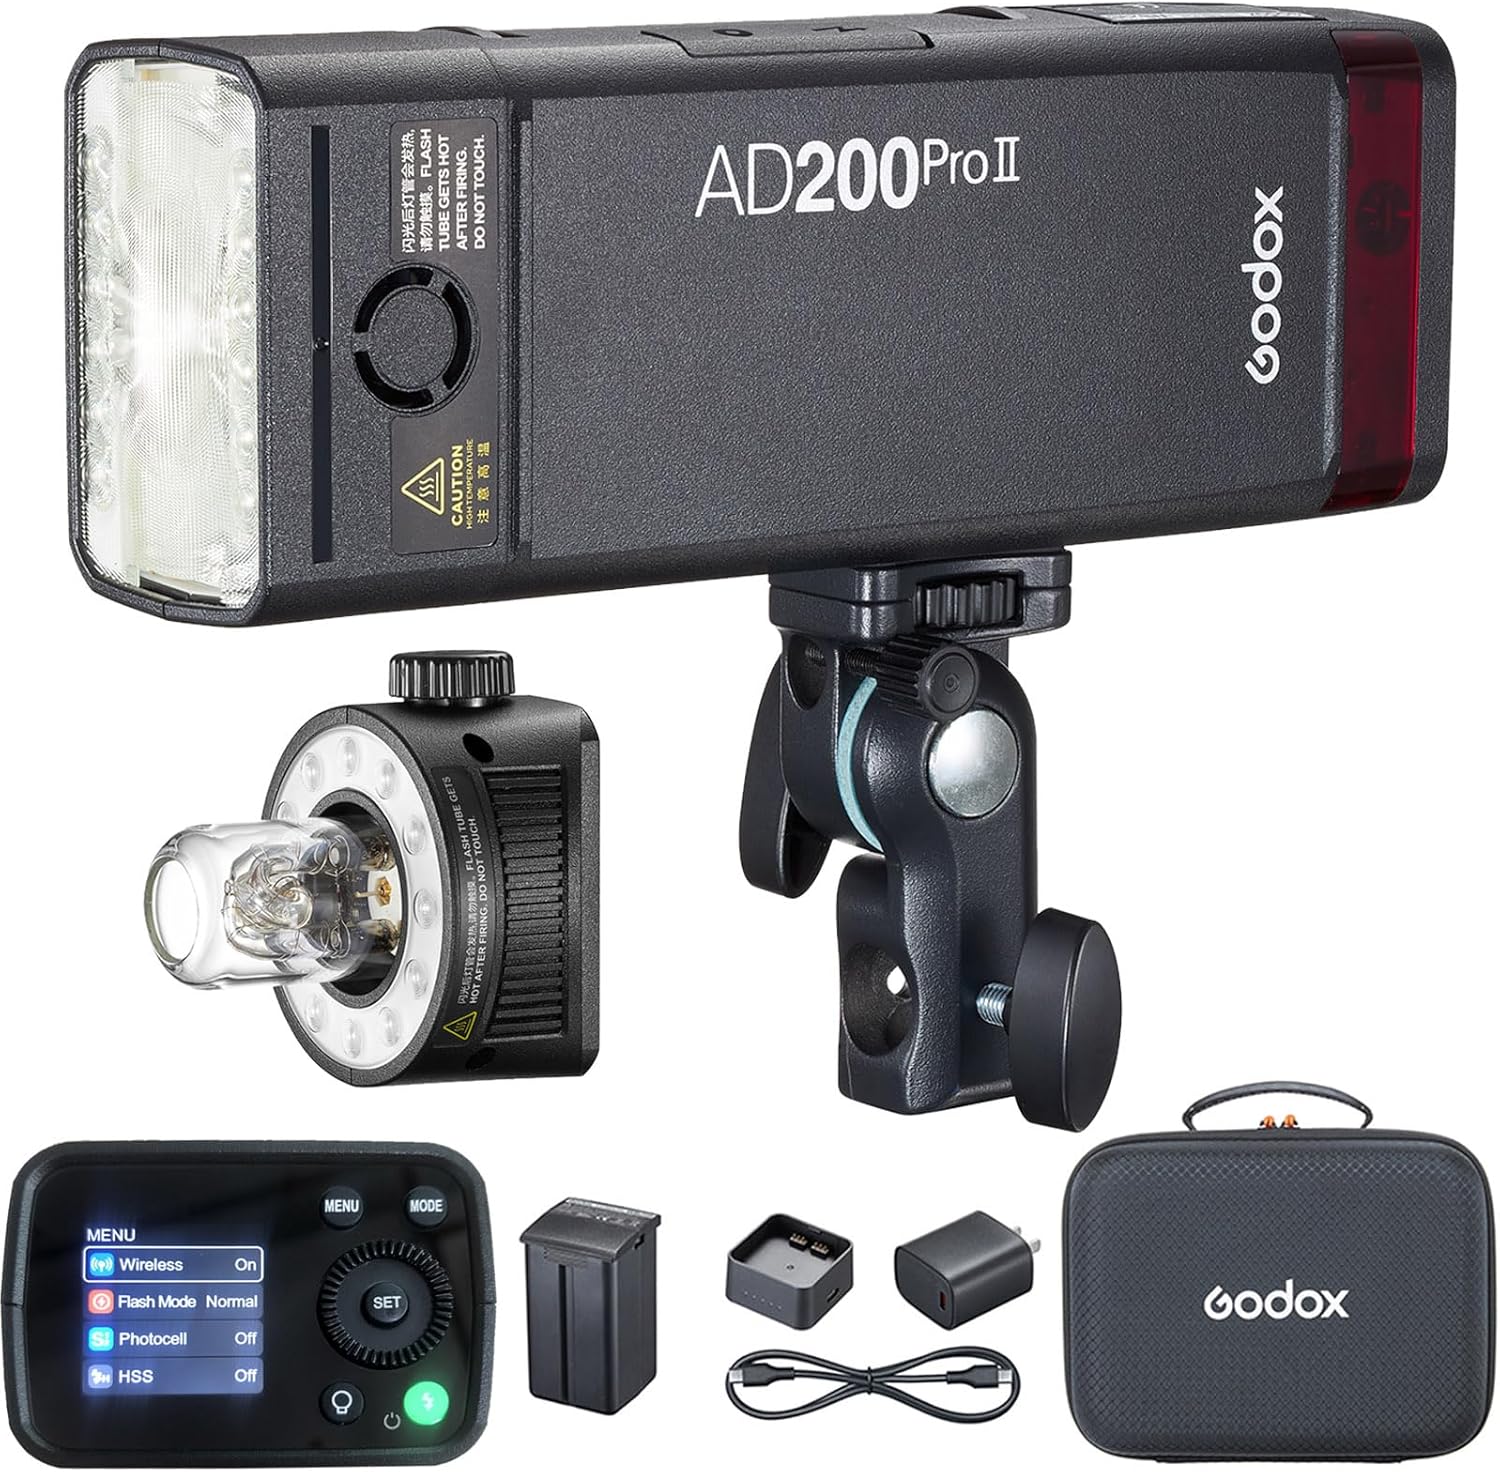
Strobes (also called flash or monolights) produce a brief, powerful burst of light. They’re measured in watt-seconds (Ws) — more watt-seconds means more light per pop. The Godox MS300 and AD200Pro II in this guide are strobes.
Continuous lights (LED panels, COB lights, ring lights) stay on all the time. You see exactly what the camera will see. The Neewer, Aputure, and Elgato lights in this guide are continuous.
Factor Strobes Continuous LEDs Power Massively more output per dollar Lower output, but improving rapidly Preview No — modeling lamp is approximate Yes — WYSIWYG Video Useless for video Essential for video Freezing motion Excellent — flash duration freezes action Poor — relies on shutter speed Heat Brief flash, minimal heat Constant output = constant heat Learning curve Steeper — you learn by test shots Flatter — what you see is what you get Battery options Limited (AD200Pro II is an exception) Many options, USB-C becoming common The honest answer: If you only shoot stills, get strobes. If you shoot any video at all, get continuous LEDs. If you do both, get one of each — a strobe for portraits and an LED panel for video. The Godox AD200Pro II is specifically designed for this hybrid use case.
Power: How Much Do You Actually Need?
In a home studio — typically a 10×12 room with 8-foot ceilings and white walls — you don’t need as much power as you think. White walls act as natural reflectors, boosting your effective output by 30–50%. Low ceilings mean bounce flash actually works. Small spaces mean your light-to-subject distance is short.
For stills in a home studio:
- Headshots and half-body portraits: 100–200Ws is plenty
- Full-body portraits: 200–300Ws through a modifier
- Product photography at f/8–f/11: 200–400Ws
- Group photos: 300Ws+ per light
For continuous LED:
- Close-up portraits: 30–50W per panel
- Medium portraits: 50–100W per panel
- Full-body video: 100–200W key light
- Product flat-lays: 30–50W per panel
Add 50% to these numbers if your walls are dark (dark paint absorbs light instead of reflecting it) and subtract 30% if you’re bouncing flash off white ceilings.
Modifiers: Shaping the Light You Bought
A bare light is a blunt instrument. Modifiers are what turn “bright” into “beautiful.” Here’s what matters for home studio use:
Softboxes are the workhorse modifier. They enlarge the light source relative to the subject, creating softer shadows and more even illumination. For home studios, a 24″–32″ softbox is the sweet spot — large enough to wrap light around a face, small enough to fit in a 10×12 room. Rectangular softboxes mimic window light; octagonal ones create rounder catchlights.
Umbrellas are the budget-friendly alternative. Shoot-through umbrellas (white) produce very soft, very wide light — great for beginners, wasteful in small rooms because light sprays everywhere. Reflective umbrellas (silver) are more efficient and more directional. Silver produces contrastier light; white produces softer light. For home studios, reflective is usually the better choice because it keeps light on your subject instead of your walls.
Beauty dishes are the dramatic option. They produce a concentrated pool of light with a soft edge falloff — think editorial portraits with sculpted cheekbones. In a small room, a beauty dish is more practical than a large softbox because it directs light precisely instead of spraying it everywhere.
Grids and snoots control spill. In a small room, they’re essential for preventing light from bouncing off walls and contaminating your shadows. A grid on your rim light keeps it on the rim. A snoot on your hair light keeps it out the background. These are small, cheap, and transformative in tight spaces.
Color Temperature: The Invisible Variable
Color temperature is measured in Kelvin (K). Daylight is roughly 5500–5600K. Tungsten bulbs are ~3200K. Candlelight is ~1800K. Here’s what matters for your home studio:
- Daylight-balanced lights (5600K): Match window light. The standard for most photography strobes. If you shoot near windows, you want 5600K.
- Bi-color lights (3200–5600K): Match warm indoor lights or cool window light. Essential if you mix ambient and artificial light.
- Extended range (2700–6500K+): The Amaran and Elgato lights cover this range. Useful for creative effects and matching unusual ambient conditions.
- Full RGB: For creative color work — colored backgrounds, rim lighting, mood. The Neewer 660 PRO II RGB gives you 360° of color.
The critical rule: All your lights must be the same color temperature in a single shot. Mixing a 5600K key with a 3200K fill creates color casts that no amount of post-processing can fully fix. If you buy bi-color lights, set them all to the same Kelvin value and verify with a meter or a gray card shot.
Home Studio Setups: Real Rooms, Real Solutions
The Spare Room Studio (10×12 ft)
This is the most common home studio. White walls help — don’t paint them dark if you can avoid it. Your setup:
- Key light: Godox MS300 with 32″ softbox at 45° to subject
- Fill light: Large white reflector opposite the key (free, effective, zero heat)
- Rim/hair light: Neewer 660 PRO II with grid, behind and above subject
- Background: Seamless paper roll on a crossbar, or a painted wall with a V-flat for negative fill
Total cost: under $400 for lighting. The reflector is your secret weapon — it costs $15 and does the work of a second light in most situations.
The Garage Studio (1-2 car)
Garages offer height and width that bedrooms can’t. The trade-off is ambient light — garage doors and windows will contaminate your studio lighting if you’re not careful.
- Key light: Godox MS300 or AD200Pro II with beauty dish
- Fill light: Godox MS300 with large softbox, 1–2 stops below key
- Background light: Neewer 660 PRO II for color accents on background
- Ambient control: Black foam core or V-flats to block window light
In a garage, you have room for full-body work, multiple light setups, and background separation. Use it. The extra space means you can pull your subject 8+ feet from the background, which creates natural falloff and separation that small rooms can’t achieve.
The Apartment Corner Studio
No dedicated room. No permanent setup. Your studio lives in a corner and gets packed away after every session.
- Key light: Neewer Softbox Kit — soft light that’s forgiving in small spaces
- Fill: White foam core board from the craft store ($3)
- Rim/accent: Elgato Key Light Mini clamped to a shelf
This entire setup breaks down into a closet in five minutes. The softbox kit comes with a carrying case. The foam core goes behind a bookshelf. The Key Light Mini goes in a drawer. You’re not making compromises — you’re being strategic.
The biggest mistake apartment photographers make is using too much light. In a small, white-walled space, light bounces everywhere. One soft key light plus a reflector is often all you need. More lights create more problems than they solve when every wall becomes an uncontrolled bounce source.
Final Thoughts: Start Simple, Grow Intentionally
The best studio lighting kit is the one you actually use. Not the most expensive one. Not the one with the most features. The one that’s set up and ready when you need it.
For most home photographers starting out, that means one of two paths:
Path 1 — Stills photographer: Godox MS300 twin strobe kit. Two lights, two modifiers, enough power to shoot anything in a home studio. Add a reflector. Done.
Path 2 — Video or hybrid shooter: Neewer 660 PRO II RGB kit. Two panels, full color control, always-on preview. Add an Elgato Key Light Mini for rim lighting or on-the-go work. Done.
From either of these starting points, you can grow intentionally — adding an AD200Pro II for location work, upgrading to an Amaran 200x S when you need cinema-quality key light, or picking up a ring light when beauty work calls.
But start. That’s the thing. The light you buy and use today is infinitely better than the light you research and never order. Every photographer who ever made a living with a camera started with one light and a white wall. Your home studio is waiting. Turn it on.